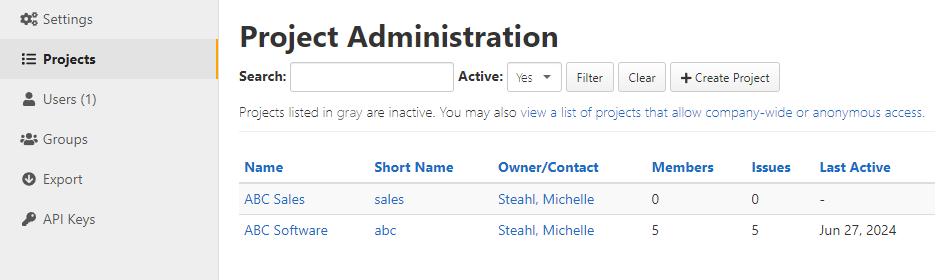
Navigate to the Project Administration screen by clicking Admin > Projects from the Company Administration navigation bar. From this page:
- Create Project - click this button to create a new project.
- Via the view a list of projects that allow company-wide or anonymous access link, you can view a list of projects and what access they have within the company or outside of it.
- You can select a radio button to show all projects or to show only active or inactive projects.
- If many projects are listed, you can narrow down the list by typing a word or words from the name in the Filter field. When the Filter field is blank the table will be unfiltered.
In the table, you can click the name of a project to go to the Home page for that project. You can also see the Short Name, the project Owner/Contact, the number of members, the number of issues, and the last active date.
Creating a new project:
Only company administrators can create a new project, however a non-administrator can request that a new project be created.
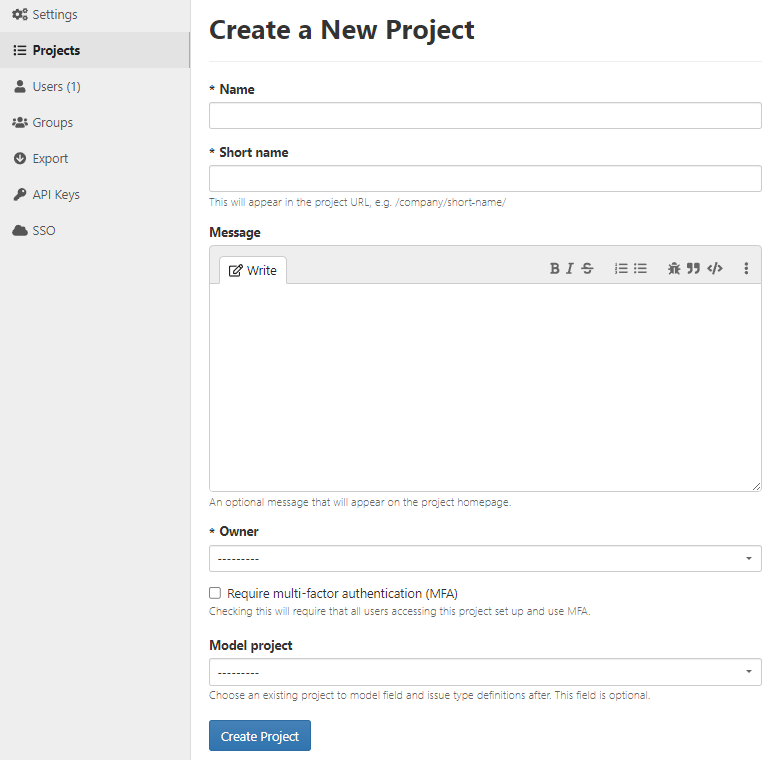
- If you are a company administrator, click Admin > Projects to view the Project Administration screen and then click Create Project.
- Enter a name for the project.
- Enter a short name for the project. The short name can only contain lowercase letters, numbers, underscores, and hyphens. It is used in the URL for the project.
- If you want, enter a Message to appear at the top of the project's home page.
- Select an Owner for the project. This person is the initial project manager and the person to whom e-mails like access requests are sent.
- If SSO is enabled but not required for the company, the Require single sign-on (SSO) checkbox can be checked to require users in this project to authenticate via SSO.
- Check the Require multi-factor authentication (MFA) box to require all users accessing this project to set up and use MFA. If the user has not set up MFA previously, they will be prompted to set it up the first time they access this project.
- If SSO is enabled for the company, then the Allowed SSO identity providers field appears. It allows one or more configured providers to be selected. Project users will be required to login via one of these providers in order to access the project. Leaving the field blank will allow users authenticated with any provider to access the project with the correct permissions.
- If there is an existing project in your company that you want to copy as a starting point for this project, select that project in the Model project field. The new project will include the following copied elements of the project it is modeled on:
- Project Settings (Except the ones entered on this page)
- Custom fields
- Issue Types
- Roles
- Groups
- Workflows
- Comment format rules
- Click Create Project to create the new project.
Initially, only the project manager will be a member of the project. See Project Members for instructions on adding other members to the project.
Edit or delete an existing project:
From the company Admin menu select Projects to open the Project Administration screen. Then click on the project you want to edit or delete to open the Edit Project screen.
From this screen you can edit:
- The project Name
- The project Message that appears at the top of the project homepage
- The status of the project
- The project Owner
- The single sign-on authentication settings (if SSO is enabled but not required for your company)
- The multi-factor authentication settings
Once you are done editing, click on the Save Project button. You can also delete the project by clicking on the Delete Project button.
Note: It is strongly recommended that you export the project before deleting it in case you need the data in the future. Once a project has been deleted, it cannot be restored. If you are no longer working on the project but may want to restart it or keep the data readily available you can make it inactive.